Gift with purchase
-
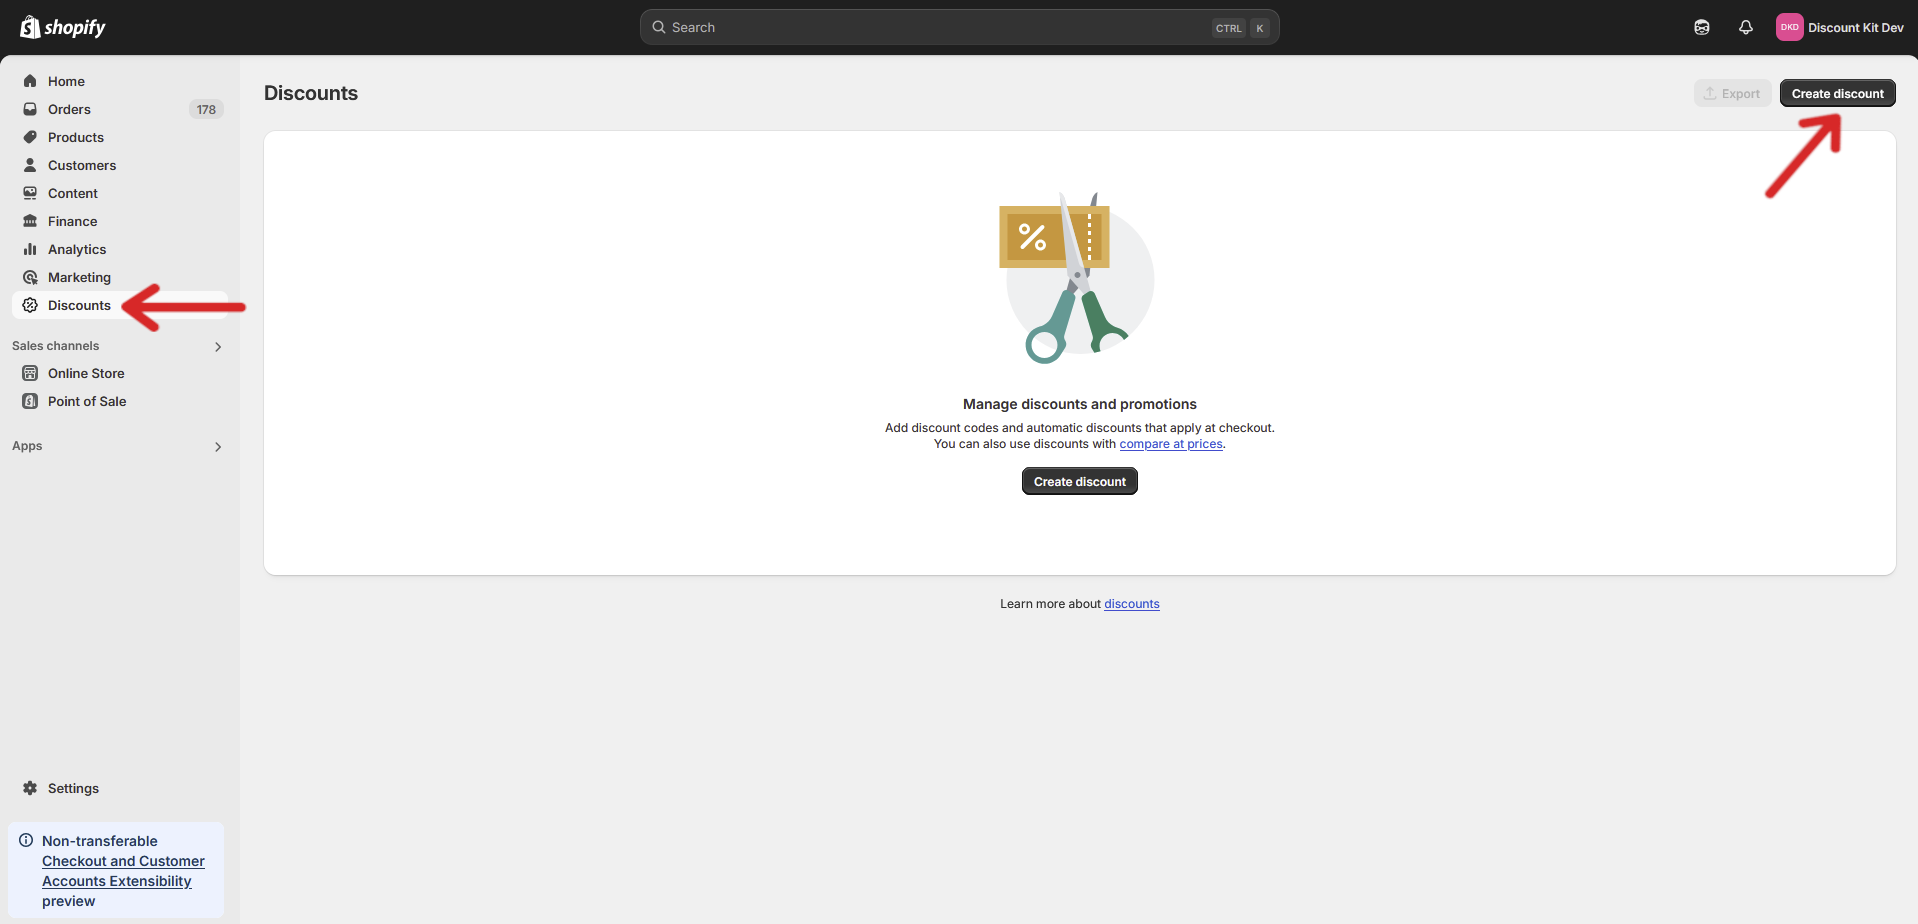
Open your store’s Discounts page and click Create discount
-
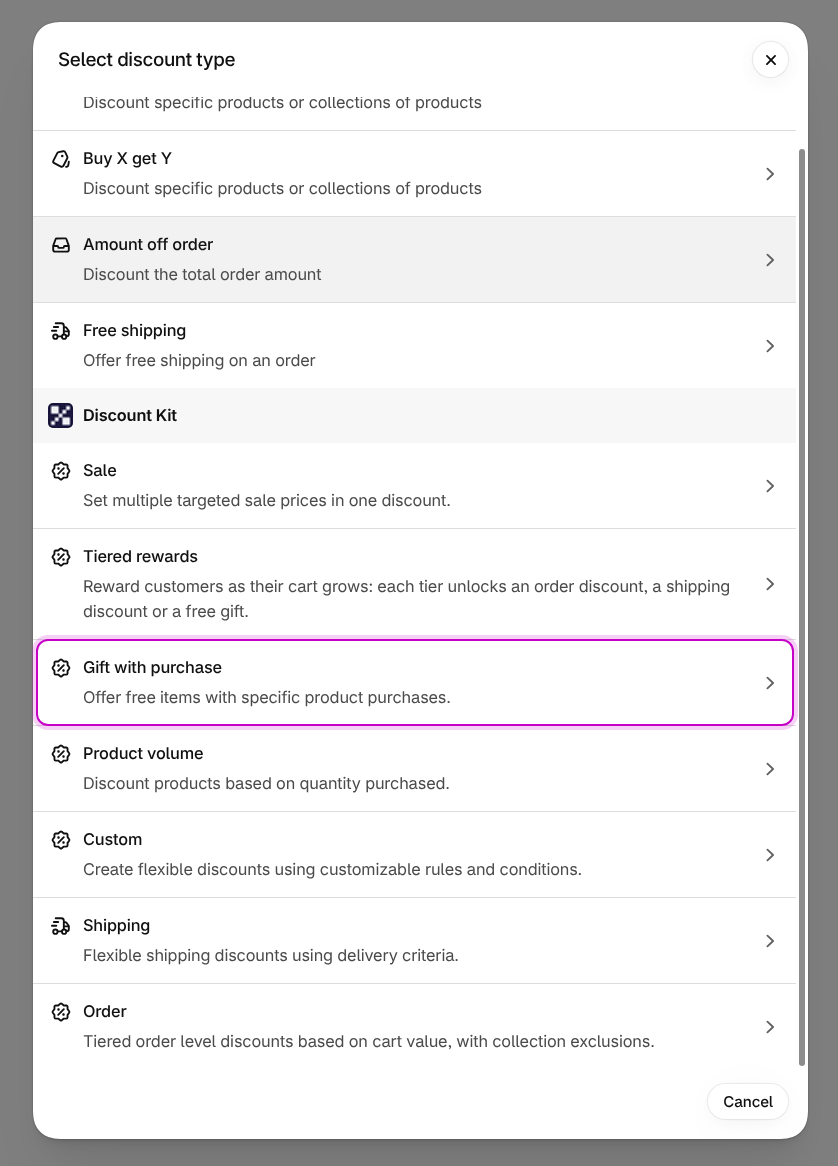
Scroll down to the Discount Kit section, which should now be available, and click Gift with purchase
-
Fill in the desired settings and click Save
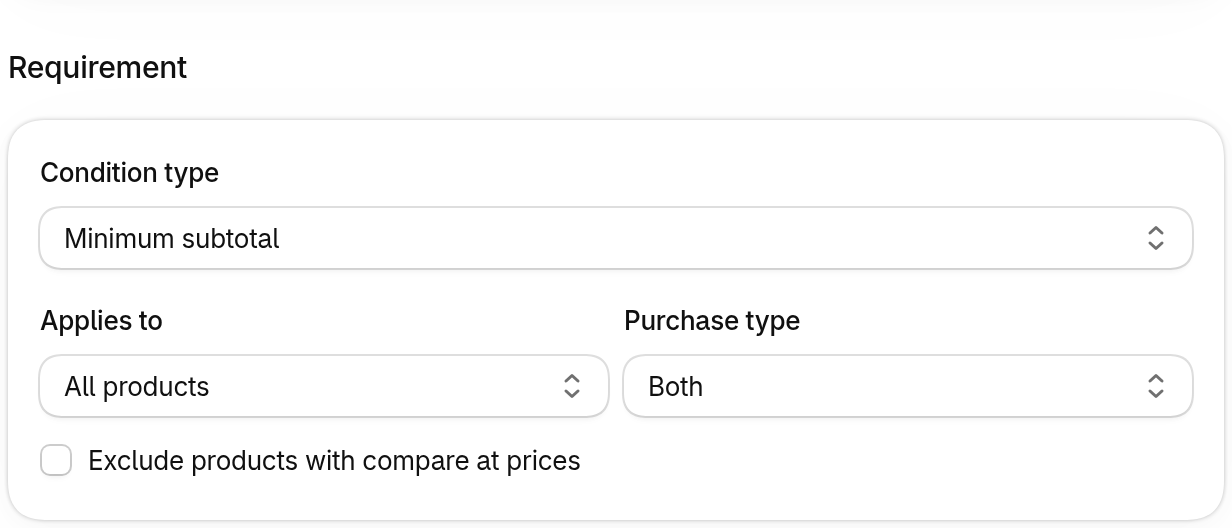
Settings
Section titled “Settings”Condition type
Section titled “Condition type”What the cart needs before the gift unlocks: a Minimum quantity of items, or a Minimum subtotal.
Applies to
Section titled “Applies to”Which products count toward the requirement: all products, specific products, or collections.
Purchase type
Section titled “Purchase type”Whether one-time purchases, subscriptions, or both count toward the requirement.
Exclude products with compare at prices
Section titled “Exclude products with compare at prices”Products with a compare-at price don’t count toward the requirement.
Selection strategy
Section titled “Selection strategy”Which gift items in the cart are made free:
- Only products added via storefront widgets (e.g. gift selector) — only gifts added by Discount Kit’s gift selector or automatic gifts are free. If a customer adds the same product to the cart themselves, they pay for it.
- Any matching product — any of the gift products in the cart is free once the requirement is met.
Discount codes always use Any matching product: the storefront widgets can’t add gifts for a code the customer enters at checkout.
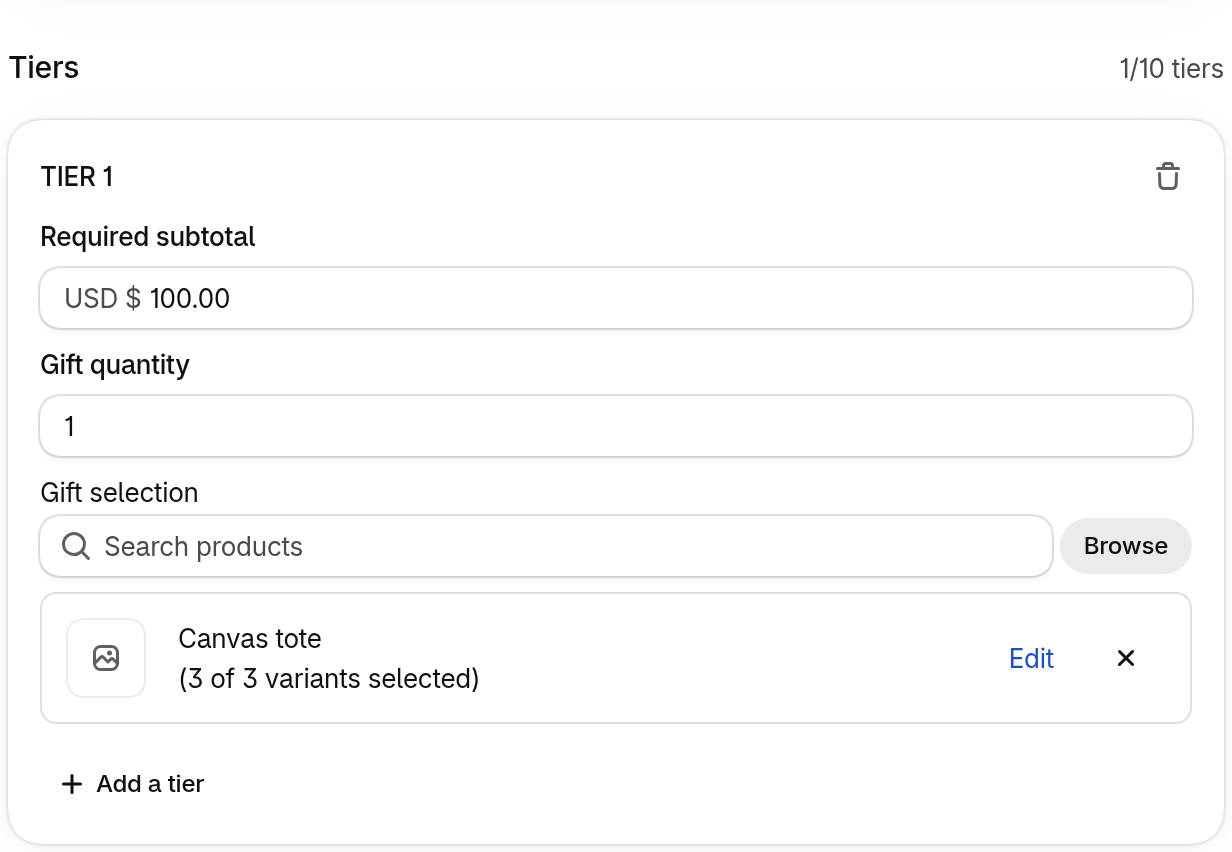
A discount can have up to 10 tiers, each unlocking its own gift.
Required quantity / Required subtotal
Section titled “Required quantity / Required subtotal”How many items, or how much spend, unlocks the tier.
Gift quantity
Section titled “Gift quantity”How many gift items the customer gets free.
Gift selection
Section titled “Gift selection”The products the gift can be. Click Browse to pick them, and Edit to choose which variants count.
Integrations
Section titled “Integrations”Automatic Gifts
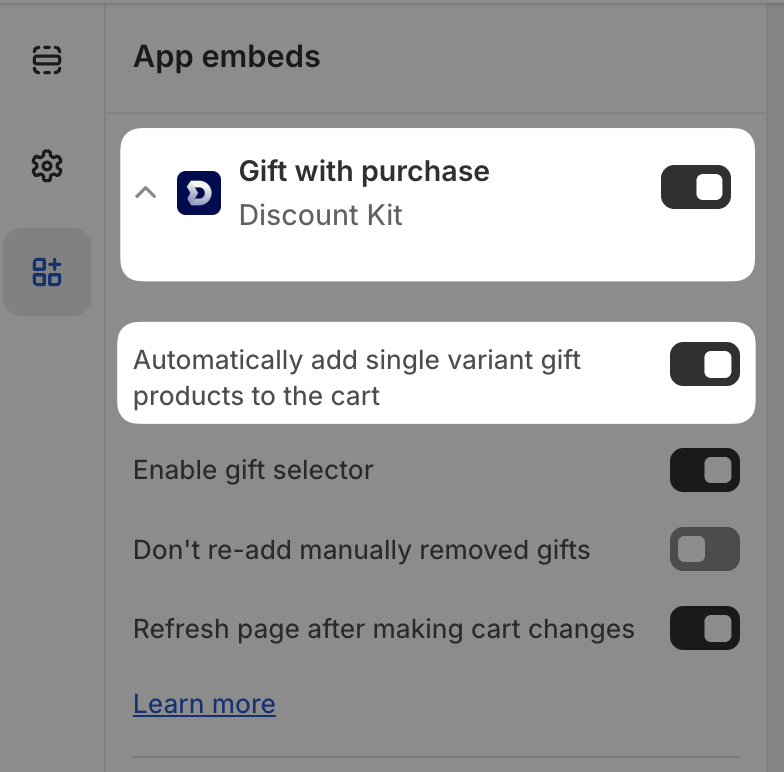
Section titled “Automatic Gifts”Open your store’s theme editor. Select App embeds in the left hand panel and then enable Gift with purchase from Discount Kit. Open up Gift with purchase’s settings using the drop-down arrow and select Automatically add single variant gift products to the cart.
Once enabled, once a customer has unlocked a Gift with Purchase discount tier that contains a single product variant it will automatically be added to the cart. For gift tiers that contain multiple variants and the customer needs to choose from among them see instructions for enabling the Gift Selector below.
Cart updates
Section titled “Cart updates”After Discount Kit adds or removes a gift, something has to re-render the cart the shopper is looking at. This is handled automatically:
- Themes built on Shopify’s standard cart (Dawn and Horizon families, and any theme that configures
Shopify.actions.updateCart) receive the gift through Shopify’s cart action. The theme re-renders its cart drawer or page in place, and Shopify dispatches the standardshopify:cart:lines-updateevent for anything else listening. - Rebuy Smart Cart is detected automatically. Gifts are written through the cart AJAX API, which Smart Cart watches, and Smart Cart re-renders itself. No setup is needed.
- Everything else gets the gift through the cart AJAX API, and the page reloads so the cart cannot fall out of sync.
If your theme re-renders the cart itself, you have two ways to take over from the reload:
-
Adopt Shopify’s standard cart actions. Configure
Shopify.actions.updateCartin your theme and listen forshopify:cart:lines-update. Discount Kit writes gifts through the action, so your theme sees them like any other cart change and no reload happens. See Shopify’s guide to standard storefront events and actions. -
Use a custom event integration. In the Gift with purchase app embed, uncheck Automatic cart updates and enter an event name under Cart update event. Discount Kit dispatches that event on both
documentandwindowafter every gift change instead of reloading, and your code re-renders the cart:document.addEventListener('my-theme:cart-updated', () => {// Re-render your theme's cart here});
Whatever the mode, Discount Kit also dispatches discount_kit:cart_changed on document after every gift change. It is informational; it never changes how the cart is refreshed.
Allowing shoppers to remove gifts:
You can allow shoppers to manually remove automatically added gifts without them being re-added to the cart. This is useful when a shopper doesn’t want a particular gift, even though they’ve qualified for it.
To enable this feature, open the Gift with purchase settings in your theme editor’s App embeds section and enable Don’t re-add manually removed gifts.
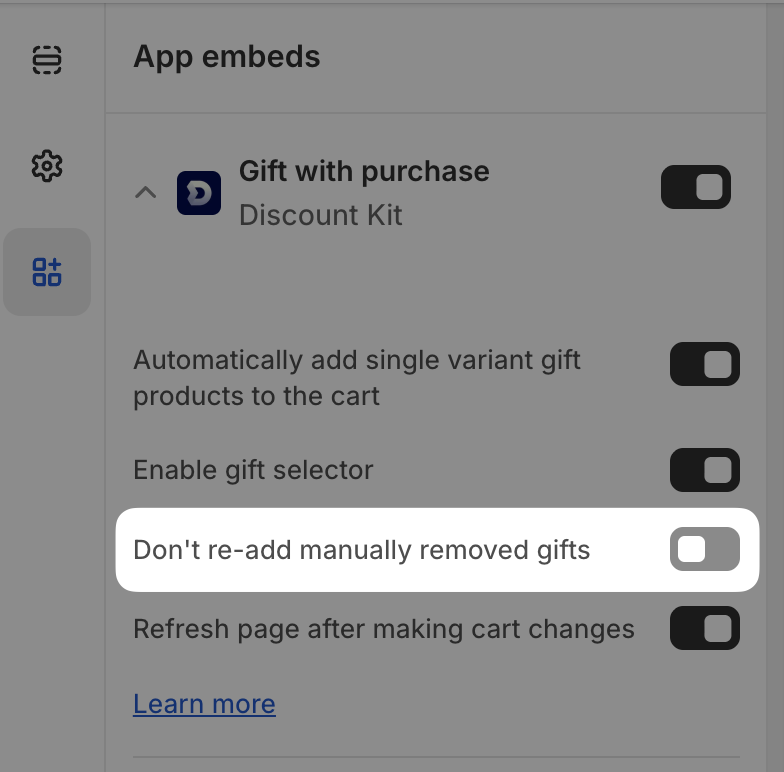
With this setting enabled, if a shopper manually removes an automatically added gift from their cart, it will not be re-added again.
Gift Selector
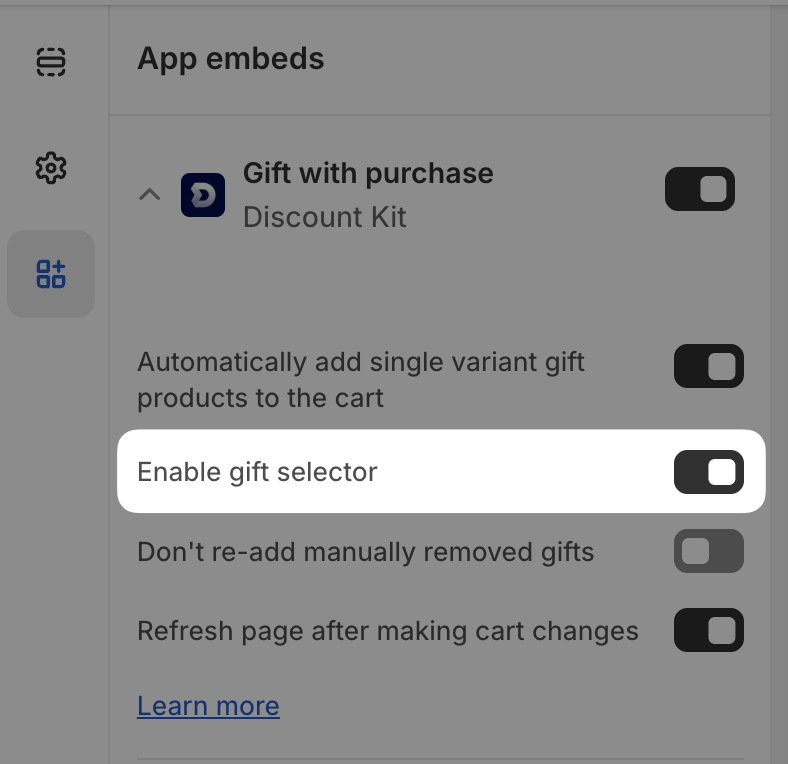
Section titled “Gift Selector”To let customers choose their gift when multiple variants are available, enable Enable gift selector in the Gift with purchase settings. You can customize the gift selector’s appearance using the styling options below this setting.
Discount Kit quickview as the gift selector (beta)
Section titled “Discount Kit quickview as the gift selector (beta)”With the Components app embed enabled, Use the Discount Kit quickview (beta) swaps the classic modal for the Gift Selector: one slot per gift, the tier’s products to pick from, and a single Add to cart for the lot. Two settings appear under it:
- Add default gifts when the quickview is closed — closing without finishing keeps what the shopper picked and adds the first available option for the rest.
- Show a “Change gifts” button in the cart — a button under the checkout button, whenever
a claimed gift has a choice, that reopens the quickview to swap gifts. Its text and style
(match the theme’s checkout button, or a Discount Kit button in your brand colours) are
settings, and developers can place their own
<dkl-change-gifts>trigger anywhere in the cart.
The details, the styling tokens and the developer hooks are on the Gift Selector pages.
Custom Integration
Section titled “Custom Integration”For developers building custom gift experiences, Discount Kit dispatches a browser event containing gift adjustment data:
Event Name: discount_kit:gift_adjustments
This event provides a list of gift products to add to, and cart lines to remove from, the cart as a result of changes to the cart.
Event Structure:
event.detail carries add, one entry per tier that still needs gifts, and remove, the
gift lines to take out:
{ add: Array<{ discountId: string discountTitle: string giftMarker: string // the `_dk_gift` value this tier's gift lines need discountTier: number // 0-based; write it as `_dk_gift_tier` quantity: number // how many gift units the tier still needs options: Array<{ // the products the gift can be id: number handle: string image: string | null options: unknown // the product's options_with_values priceRange: { min: number; max: number } // major units (e.g. 12.5) title: string anyVariant: boolean // true when any variant qualifies variants: Array<{ // the variants that qualify available: boolean id: number title: string image: string | null options: string[] price: number // cents }> }> }> remove: { [lineKey: string]: 0 // cart line keys to set to 0 }}Important: Gift lines need two line item properties, which is how the discount function and the embed recognise them:
_dk_gift: the add’sgiftMarker— the discount title for a gift with purchase, the discount’s own id for a tiered rewards gift offer_dk_gift_tier: the add’sdiscountTier, as a string
add also covers the gift offers of tiered rewards discounts; they’re added and removed
exactly like gift with purchase gifts. remove lists every gift line whose discount is no
longer active, or whose tier the cart no longer reaches.
Example Usage:
document.addEventListener('discount_kit:gift_adjustments', async (event) => {  const { add, remove } = event.detail
  // Remove gifts that no longer apply  if (Object.keys(remove).length > 0) {    await fetch('/cart/update.js', {      method: 'POST',      headers: { 'Content-Type': 'application/json' },      body: JSON.stringify({ updates: remove }),    })  }
  // Add each tier's gift — here, the first available variant of its first product  const items = add.flatMap((tier) => {    const variant = tier.options[0]?.variants.find((v) => v.available)    if (!variant) return []    return [      {        id: variant.id,        quantity: tier.quantity,        properties: { _dk_gift: tier.giftMarker, _dk_gift_tier: String(tier.discountTier) },      },    ]  })  if (items.length > 0) {    await fetch('/cart/add.js', {      method: 'POST',      headers: { 'Content-Type': 'application/json' },      body: JSON.stringify({ items }),    })  }})